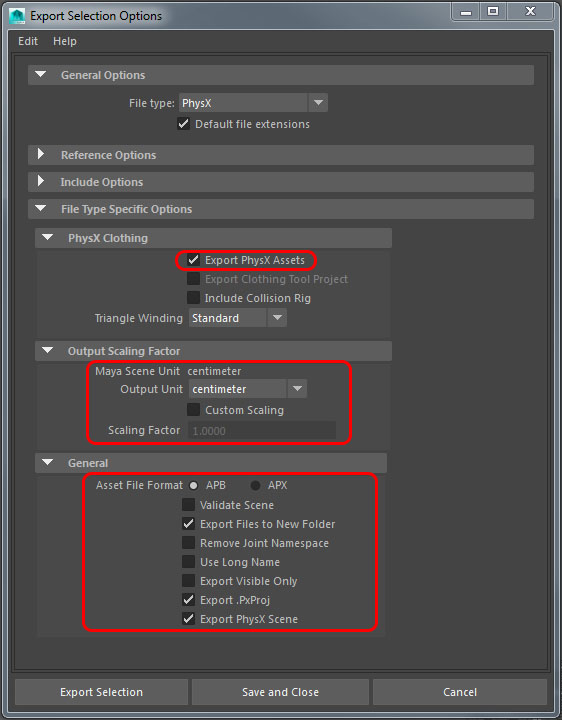
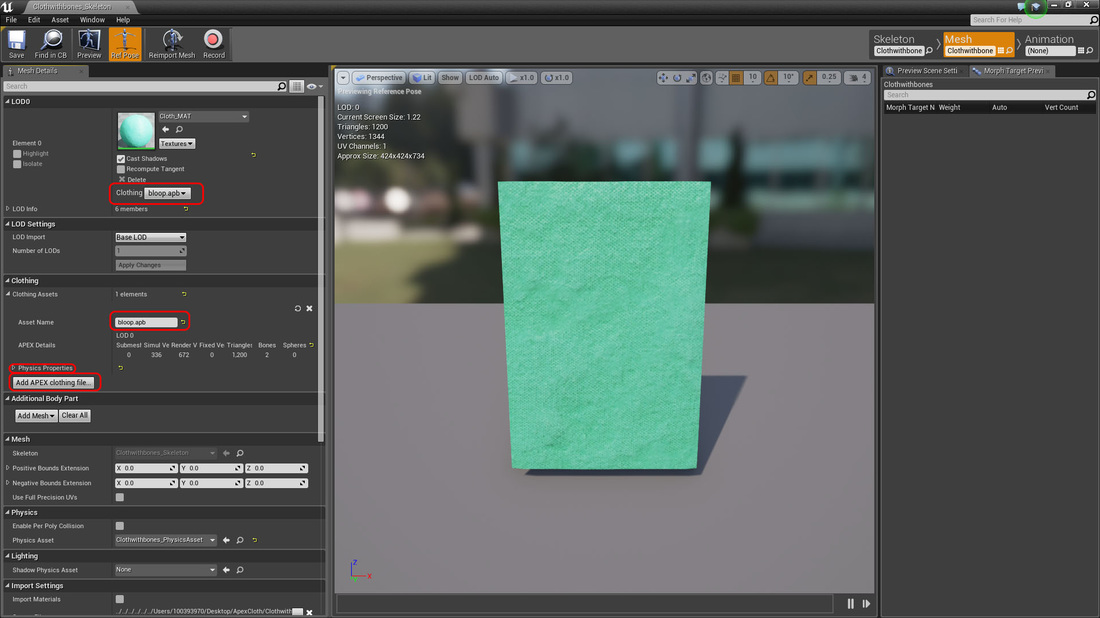
Making Clothing in MayaEnable PhysX plugin in Maya. 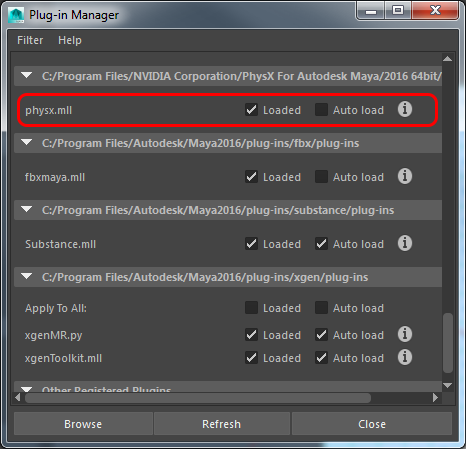 You must have a mesh with bones skinned to it. Once you do, with the mesh you wish to make into cloth selected, click on the "Create PhysX Clothing" on the PhysX toolbar.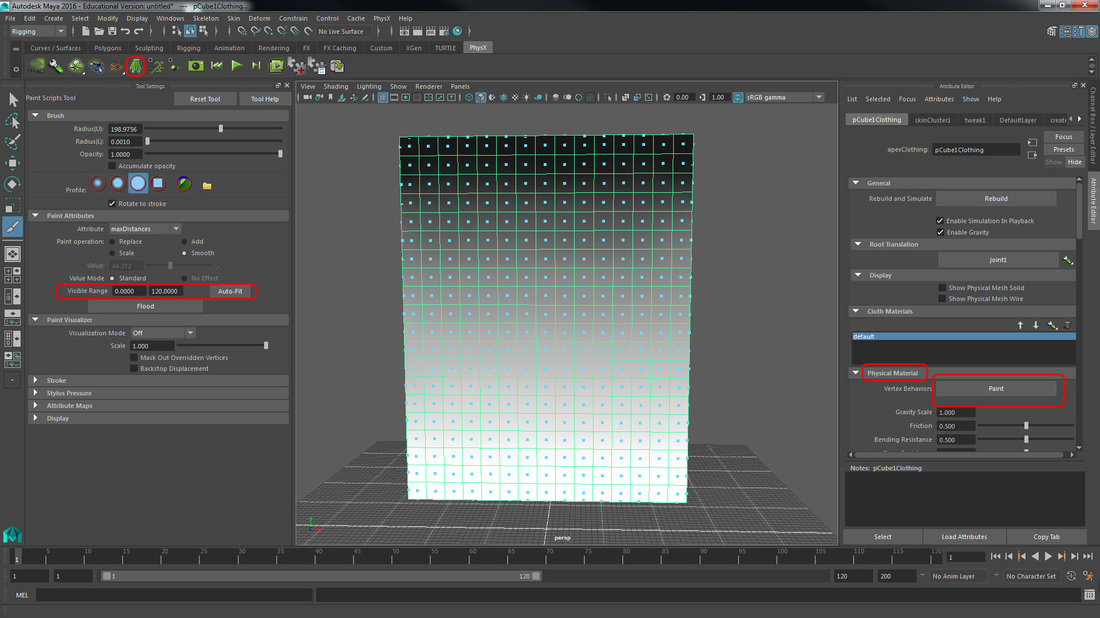 In the attribute editor on the right side of the screen, click the Paint button in the Physical Material dropdown to paint in the weight of the fabric. The values painted in effect how much it will be able to move. The value of the visible range will indicate how much the fabric can move. So by setting the minimum to 1 and the max to 120, whatever is black on the fabric will only be able to move 1 unit, and whatever is painted white will be able to move 120 units in any direction. Make sure to paint in your values and smooth them for a good transition. Painting with a value of zero, which will show as purple, indicates what will not move. Note: The effect of your painting can be tested by clicking "Play/Stop Simulation" in the PhysX menu. The amount of time you can spend in your simulation is dependant on the number of frames in your Time Slider. Setting your Playback Speed to Play Every Frame helps as well. You can play with how physics affect your cloth in the Physical Material dropdown in the Attribute Editor as well, but you don't really need to, as you can edit it in Unreal where it will behave more smoothly anyway. WARNING: Maya is likely to crash while doing this. Don't play around in it too much. Next, switch the Attribute under Paint Attributes from maxDistances to latchToNearest. This will keep your mesh from going through itself by telling it which side is the front. Make sure to set your front facing side to Drive and the back side to Latch. Also make sure the Latch values don't bleed onto the front side of your mesh. They will be very distinguishable because the opposite side will turn purple. 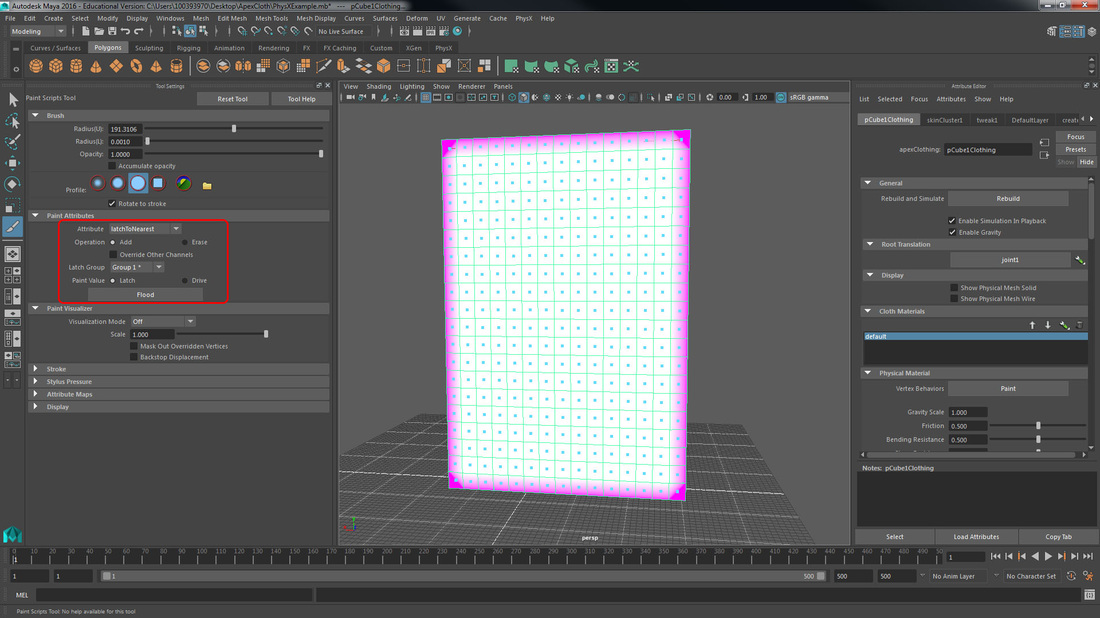
|